|
|
|
| My Experience with Applying Herculiner Bedliner in my Bronco II Tub | ||||||||||||||||||||||||||||||
| I recently purchased an '88 Bronco II which I intend to build into a trail rig. After spending more than I should have on a set of '77 Bronco axles, I was looking for cheap projects to hold my rampant spending tendencies at bay while I save up for gears, lockers, springs and such. Although in general I am morally opposed to dragging a perfectly good vehicle through deep mud or water when a bypass or bridge exists, it sometimes is a must, and this will never be a perfectly good vehicle. What I really hate about deep water and mud is the nasty smell that seems to want to stay forever even after a thorough cleaning, as muck collects and mildew forms beneath the carpet. I have swapped in a vinyl floor in my pickup, but was never too thrilled with the results, and water still finds it's way underneath. So I decided that I'd go the bedliner route, and a commercial spray-in job was out of the question, given my budget (also, the plan for the build-up was to do everything myself, including gears, as a learning experience). Anyways, I decided to go the Herculiner route as I wasn't terribly concerned with it looking perfect. In the end, it ended up looking very nice and I was very pleased with the results. | ||||||||||||||||||||||||||||||
|
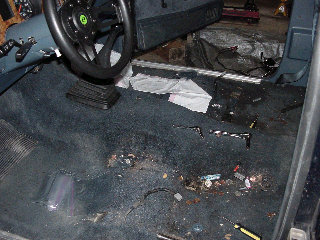
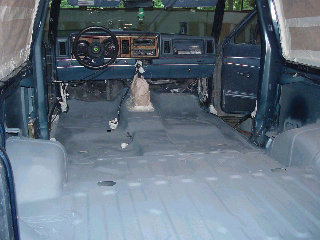
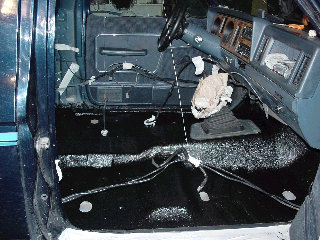
Obviously, the first step is to gut the interior by removing the seats and seatbelts, interior trim, and then the carpets. The only slighty "unconventional" tool I needed was a larger sized Torx bit to remove the seatbelt bolts. Fortunately I had the appropriate bit at the bottom of one of my toolboxes. As my rig is slated for 90% off-road use, I had no plans of reinstalling the interior trim pieces which made for a speedy gutting - an hour or two at most. I didn't need to remember exactly which nut and bolt held up which piece of plastic. In the gutting process I found about $10.00 in very sticky change, several peanut M&M's, and what I think was a Cherry Pop-Tart. Unfortunately, the interior trim pieces are necessary for holding up the headliner, but I had also decided I was going to get rid of that so I ripped it out too. All exposed sheet metal will be covered with Herculiner, including the ceiling. If you're planning on reinstalling your interior, be very careful with the headliner as the foam backing is fragile. |
||||||||||||||||||||||||||||||
|
||||||||||||||||||||||||||||||
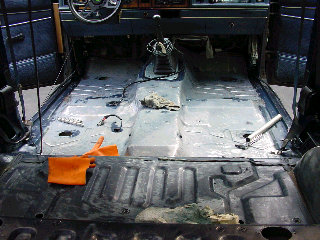
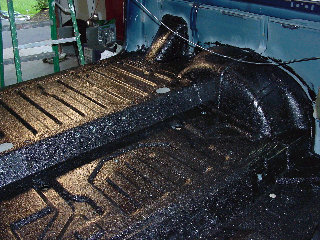
| After tearing out the carpet, it became apparent that a lot of prep work will be required. The floor pan, transmission hump, and rear wheel wells are covered in a sound-deadening material (the shiny black stuff in the picture). This material was cracked and falling off in many areas. Some of it would peel off with my hands. It wouldn't make any sense to slather on the polyurethane if the foundation was going to fall off. So all the sound-deadening material needed to go. There was also lots of excess body seam adhesive that could be cleaned up. | ||||||||||||||||||||||||||||||
|
||||||||||||||||||||||||||||||
|
||||||||||||||||||||||||||||||
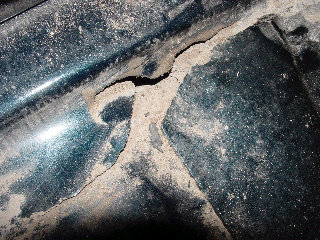
| There were some cracks in the floorpan near the door sills. I cleaned them up with a wire wheel, terminated the ends of the cracks by drilling a small (~3/16") hole at the ends, forced the cracks flush with a bottle jack, and stitched up the cracks with my little MIG welder. I was using .030" wire, and even at the low settings it was very easy to burn through the floor pan - I am kind of a novice welder. If I were to do it again I'd use smaller wire to avoid the additional time with the welder filling in holes. | ||||||||||||||||||||||||||||||
|
||||||||||||||||||||||||||||||
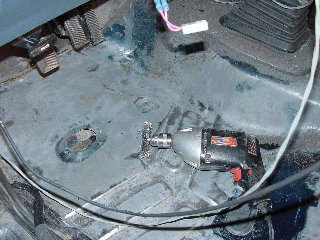
| I scraped off most of the sound deadening material with a chisel. This was probably the most tedious part of the job, and many a "Silver Bullet" was downed. | ||||||||||||||||||||||||||||||
|
||||||||||||||||||||||||||||||
|
A wire wheel attachment on an electric drill was used to take off the remainder of the sound-deadening material. It worked quite well, and I could have used the wheel to take off all the material, but it made too much of a mess and I would have had to break out the vaccuum every 30 seconds. There was also lots of body seam adhesive on the tub. For the most part I left the seam adhesive alone, except where obvious large globs had been dropped and were not serving any filling purposes (there was excess splattered here and there). This "glue" was stuck on real well, and I wasn't too worried about covering over it with the Herculiner, and it was serving a valuable purpose. |
||||||||||||||||||||||||||||||
| I also cleaned all the sound deadeneing material off of the wheel tubs, as these would now be exposed with the interior plastic pieces gone. Again, big pieces with the chisel, remainder with the wire brush. | ||||||||||||||||||||||||||||||

|
||||||||||||||||||||||||||||||
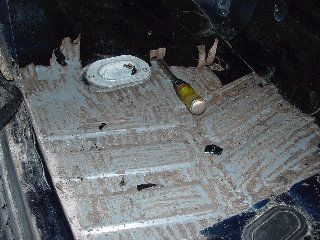
| After all of the sound-deadening stuff was removed, and the major globs of excess glue ground off, I vaccuumed the tub out real well. I then scrubbed the tub with a TSP/water solution and dried it. I roughened the surfaces that weren't already seriously roughend with a Scotchbrite pad, then I broke out the Xylol and wiped eveything down with the solvent. I really concentrated on the glue at the body seams as these areas were pretty grimy. The solvent did not appear to negatively effect the adhesive. The solvent was pretty nasty, and I could feel the base-pairs in my DNA shifting, so I pushed the B2 outside for better ventilation. | ||||||||||||||||||||||||||||||
|
||||||||||||||||||||||||||||||
|
||||||||||||||||||||||||||||||
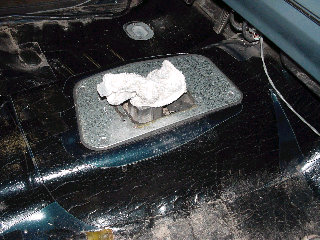
| I had to leave town for a week, so I shoved it in the garage hoping the bare metal would not rust. When I returned everything looked fine. But I cleaned it with solvent again, then primed the bare metal (actually I primed the entire floor). I doubt the priming was necessay, but I don't think it should hurt, either. | ||||||||||||||||||||||||||||||
|
I cracked open the gallon can of Herculiner. This was a Herculean task in itself - that lid was really on there and I mangled it pretty good! I stirred the can very well using a drill attachment designed for that purpose. There's loads of rubber particles amidst the solvent/urethane that you have to keep evenly suspended. Then, using a brush, I dabbed the material in the corners, tight areas, and seams. You don't actually brush the material on, you dab it on. It applies amazingly even using this method. |
||||||||||||||||||||||||||||||
|
||||||||||||||||||||||||||||||
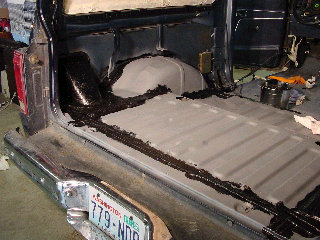
| I used the supplied stipple roller for the flatter parts. It goes on fairly quickly, especially in comparison to all the prep work. The first coat was applied light per the instructions. I wasn't worried about getting a little excess on the sides, as I will coat the remainder of the interior sheet metal after I buy some more Herculiner. | |||||||||||||||||||||||||||||
|
After the first coat was mostly hardened, I applied a heavy second coat. The material went on very evenly, which suprised me - I was thinking there would be roller and brush marks everywhere. This preconceived notion is why I never considered using it to line the bed in my pickup. In fact, the material looks by and large indestinguishable from a commercial spray-in job. It also appears to be quite durable, much moreso than the rattle can bedliner material that I use all the time. |
||||||||||||||||||||||||||||||
|
||||||||||||||||||||||||||||||
|
||||||||||||||||||||||||||||||
|
||||||||||||||||||||||||||||||
|
||||||||||||||||||||||||||||||
|
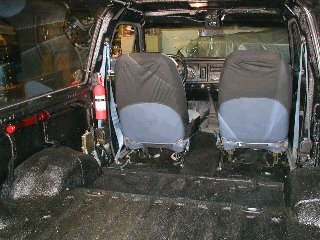
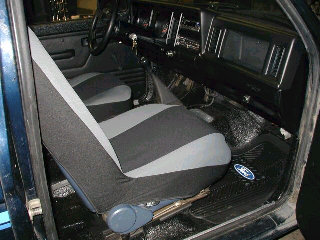
I ended up painting the dash (rattle-can job) because it looked awkward with all the black. I also replaced the carpeted door panels with plastic ones. All and all, I am very pleased with how it came out. With all the prep-work reuired, it was way more work than installing a vinyl floor like I did in my Supercab Ranger, but I think it looks better and there will be far less places for water to get trapped. I am definately considering losing the drop-in bedliner in my truck for this stuff. Doing the bed should be much easier. |
||||||||||||||||||||||||||||||